

Showing posts with label Canning/Preserving. Show all posts
Showing posts with label Canning/Preserving. Show all posts
Friday, October 3, 2014
Pumpkin Butter Recipe
If you love pumpkin as much as I do, you understand the delights of Pumpkin Butter - all the flavor of Pumpkin Pie in a creamy spread (with no eggs)... Pumpkin Butter is a product that is no longer considered safe for home canning - because pumpkin is so very dense that one cannot get hot enough temperatures consistently to ensure there are no bacteria (especially botulism) in the finished product. Since I don't like to play Russian Roulette with my family's health, I make my pumpkin butter in small batches and freeze them!
Thursday, June 12, 2014
Mulberries and Syrup
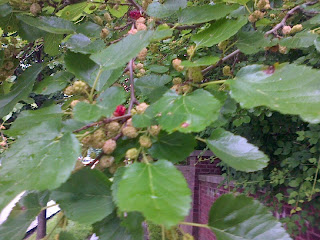
The mulberries are almost in season, unripe green and red berries tease the birds and tease me with promises of the dark purple gems of sweet juicy goodness to come!
Mulberries are very common in my area - the trees I picked from as a child are still bearing berries. I brought my son there, and in another year I will bring my grandson and once again enjoy the sticky fun of berries being picked off the tree and then smooshed in little fingers. Mulberries are fragile, they bruise and rot too quickly to sell at market - but if you have a dry day and a few hours, you can pick a few sackfuls of these healthy and delicious berries - and then freeze or preserve what you can't stuff right into your mouth (smile). One quick and easy tip? Lay a clean sheet under the tree...and shake the branches. Berries will fall right into your hands.
I usually pick carefully, but if children are helping you will want to look through for any bits of stem or leaves (which can make you sick). You also want to ensure you *only* pick ripe berries, as unripe berries will give you a tummy ache.
I give my berries a quick swirl in a water/vinegar bath (1 part white or cider vinegar to 10 parts water) and then gently shake them dry in a colander lined with paper towel. Once dried off, you can lay the berries on waxed paper or parchment lined cookie sheets for freezing (once frozen, pop them into labeled freezer bags).
Mulberry Syrup
For a delicious syrup, gently simmer berries in a heavy-bottomed saucepan with a small amount of water (figure about 1/4 cup to 4-5 cups of berries) to keep them from scorching. Gently press down on the berries as they cook, to release the juice. Strain the juice into a bowl, being sure to gently press the berries to extract all the juice. For each cup of juice, I add about 1/2 cup organic sugar or honey, to taste. Return to the saucepan, simmer and stir til well combined. Pour into a hot jar, cover, and cool. This will store well in the refrigerator. To store larger quantities, you will want to process in a hot water bath - and I would add 1 Tsp lemon juice to each pint if I were doing that.
How do you like to enjoy mulberry season? Comment below!
Wednesday, October 23, 2013
Curried Apple Chutney
I love chutney - as a condiment with meat, as a spread on savory sandwiches, as an accompaniment to a cheese board, and as a special "mystery ingredient" in a number of dishes! This recipe, from Ball, has become a new addition to my repertoire! In fact, I am giving jars as Christmas gifts this year!

If you are new to canning, be sure to stop by Ball's Fresh Preserving website for helpful information, recipes, and safety tips!
Curried Apple Chutney
Yields about 10 pints
2 quarts chopped, peeled, cored apples (about 16 medium - 1 apple should = about 1 cup of diced apple)
2 pounds raisins
4 cups brown sugar
1 cup chopped onion
1 cup chopped sweet red pepper
3 tablespoons mustard seed
2 tablespoons ginger
2 teaspoons allspice
2 teaspoons curry power
2 teaspoons salt
2 hot red peppers, chopped (wear gloves to prevent the hot oils from spreading to your eyes, etc)
1 clove garlic, minced
4 cups vinegar
Method
Combine all ingredients in a large saucepan (I used a stockpot). Simmer until thick - for me, this took about 1/2 hour. Stir frequently (really - stir A LOT!!) to prevent sticking (and to prevent the raisins from all sinking to the bottom!).

CAREFULLY ladle the hot chutney into hot jars, leaving ¼-inch head-space. Remove air bubbles by sliding a clean butter knife or small spatula around the jar. Wipe the tops with a clean cloth dampened with vinegar before applying the lids. Screw on the bands "fingertip tight."

Process the jars for 10 minutes in a boiling-water canner. Remove jars and let sit 24 hours before removing bands. Let the chutney "season" for at least 2-3 weeks before opening - the flavors will blend during this time.
Most of all - enjoy the goodness!
Monday, August 26, 2013
Canning Pickles - Putting Food By 2013
This weekend, we were gifted a surplus of cucumbers. What to do? Pickles! While ideally I want to ferment cucumber pickles (mmm...half-sours!!), I an "not there yet" kitchen-wise. My schedule is too erratic, and I do not have a proper fermenting crock - combined this could be a disaster. So, while fermenting is still the long-term goal, short-term I made 3 pint batches of classic vinegar pickles.

1 - Put spices of choice into bottom of sterilized pint jars. I used about 1/4 tsp black peppercorns, a pinch of red pepper flakes, a pinch of dill seeds, and 1-2 cloves of peeled garlic per jar for some garlicky goodness.
2 - Wash cucumbers well. Cut into desired shape. Stuff into sterilized pint jars.
3 - Make "brine" (1/5 cups cider or white vinegar, 1.5 cups water, 2 Tbs pickling salt), and bring to rolling simmer.
4 - Carefully pour brine into the jars, covering the cucumbers and leaving 1/4" head space.
5 - At this point, you can either water bath process the jars for long-term storage (which I did), or you can pop on the lids and let the jars cool for a day and then pop into the fridge for refrigerator pickles.
Either way, wait a few days for flavor to develop before eating!
Wednesday, August 21, 2013
Canning Tomatoes - Putting Food By 2013
August and September are busy months - days off from the office are filled with prepping food for the freezer and the cupboards: chopping, blanching, simmering, pickling...
This weekend was the the tomato weekend - the NJ San Marzano tomatoes were in, and I nabbed 2 bushels:


28 quarts of crushed tomatoes done...and a few pounds of tomatoes left to make about 10 pints of salsa!
This weekend was the the tomato weekend - the NJ San Marzano tomatoes were in, and I nabbed 2 bushels:


28 quarts of crushed tomatoes done...and a few pounds of tomatoes left to make about 10 pints of salsa!
Monday, October 1, 2012
Pumpkin Butter Recipe: From the Blooming Kitchen Garden

I adore pumpkin butter - all the sweet savory goodness of pumpkin pie, without the bazillion calories! I slather it on toast on chilly mornings, and indulge my senses with all the spicy goodness. And it is SO easy to prepare!
Pumpkin Butter
- 1 6-8" sugar sweet or other pie pumpkin (pie pumpkins are less stringy than the huge jack o' lantern pumpkins)
- 1 tsp allspice (to taste - I like to sprinkle a bit more)
- 1 tsp cinnamon (again, to taste)
- Pinch ground cloves
- Up to 1 cup sugar or other natural sweetener (maple syrup - the real stuff - is wonderful)
This stores well in the fridge - up to six months (not that any has ever lasted that long here!) The USDA recommends against water bath or pressure canning pumpkin - because it is so dense. So...freeze this if you wish to preserve it beyond the recommended six months. And ENJOY!
Subscribe to:
Posts (Atom)