Showing posts with label Cookery. Show all posts

Tuesday, December 23, 2014

Got Pears? 5 Delicious Pear Recipes


Considered "the Gift of the Gods" by the epic poet Homer, pears are cousin to both the apple and the rose - a noble pedigree indeed! With their buttery flesh and delicate, slightly floral flavor, they are wonderful eaten right out of the hand - perhaps with a bit of Stilton or Roquefort cheese?

Saturday, November 22, 2014

An Easy Make-Ahead Thanksgiving Breakfast Feast


Thanksgiving morning is a hectic time - roasting the turkey and preparing all the wonderful side dishes takes a lot of work and concentration! So how do you serve your family (and maybe those out of town guests?) something special and holiday-delicious? By preparing everything a day (or two) ahead of time!

Monday, October 20, 2014

Top 10 Oatmeal Stir-ins to Make Breakfast Special!

I love oatmeal for breakfast in the colder months - warm, filling, and so darned healthy! We buy rolled oats in bulk (think 25 or 50 lb sacks) - which makes for a frugal breakfast (and ensures I have enough oats for baking treats as well).

But plain oatmeal? Sorry, doesn't do it for me. I like to jazz mine up with various stir-ins.

Sunday, October 12, 2014

Roasting a Pumpkin and Toasted Pumpkin Seeds

Roasting a pumpkin (or other winter squash is easier than it may seem - and you get delicious toasted pumpkin seeds as an added benefit! For my readers who have never roasted a pumpkin, here are the steps.


Friday, October 10, 2014

Pumpkin Cheesecake Spread

Some days you want a sweet little treat without a lot of bother. This Pumpkin Cheesecake Spread gives you all the smooth, creamy deliciousness of pumpkin cheesecake without all the work. 5 ingredients, 1 bowl, 1 step. And delicious spread over a toasted bagel!


Tuesday, October 7, 2014

Curried Pumpkin with Caramelized Onions Recipe

Today was a beautiful, crisp fall day. The kind of day that makes you want to curl up with a good book and a bowl of something warm and savory to soothe away the chill evening winds after rambling thru town and crunching over the carpet of colored leaves. But what would it be? Pumpkin soup? no...need to make more chicken stock for a proper batch of soup. But I had enough to do a little something...a little something to marry the warm flavor of the pumpkin with the bright heat of curry...and I had onions... and I remembered a dish I used to make at a restaurant I worked at so many years ago...and tweaked it...

And here we are!

Monday, October 6, 2014

Salted Caramel Sauce Recipe

This is an easy and delicious sauce - wonderful for drizzling over ice cream or sliced apples or pumpkin blondies or..... anything you can imagine! Or stir a teaspoon into coffee or hot cocoa for a treat!

Pumpkin Blondies with Salted Caramel Recipe

Last week when I was brainstorming Pumpkiny Goodness ideas, I decided I wanted to make a Pumpkin Blondie - a rich, indulgent, luscious Pumpkin Blondie. With Salted Caramel. The kind of sweet treat you can only eat in teeny tiny bite-sized servings.

I think I hit it with this recipe!


Friday, October 3, 2014

Pumpkin Butter Recipe

If you love pumpkin as much as I do, you understand the delights of Pumpkin Butter - all the flavor of Pumpkin Pie in a creamy spread (with no eggs)... Pumpkin Butter is a product that is no longer considered safe for home canning - because pumpkin is so very dense that one cannot get hot enough temperatures consistently to ensure there are no bacteria (especially botulism) in the finished product. Since I don't like to play Russian Roulette with my family's health, I make my pumpkin butter in small batches and freeze them!


Wednesday, October 1, 2014

Classic Pumpkin Bread Recipe

Its fall! Leaves are turning bright orange and yellow and red, bushels of pumpkins and apples abound at farmers markets, and the crisp scents of drying leaves fill the air. In our home this is time for baking treats, for kettles of savory soups and stews, for warm delicious scents to waft from the kitchen to perfume our home with coziness. This classic pumpkin bread is an old fall favorite, tweaked from the Libby's recipe. It is moist, sweet, spicy - and delicious!


Thursday, July 31, 2014

Parsnips Recipes from the Blooming Kitchen Garden

Parsnips: Unique Uses for the "White Carrots"

Parsnips are an often overlooked vegetable, but these delicious roots have a lot to offer! From a Spicy Parsnip Cake redolent of cinnamon and spice to a rich and creamy parsnip "Vichyssoise", these "white carrots" offer a flavor filled bite!

Leek Recipes from the Blooming Kitchen Garden

Using the "Elegant Onion" in Savory Soups and Other Delicious Dishes!

Leeks are a favored vegetable in my kitchen. Their delicate onion-like taste lends a subtle flavor to so many dishes: soups, quiches, savory pies, salads...they have been used for millennia by chefs of distinction and humble home cooks alike. In fact, archaeologists have come across dried bits of leeks - along with drawings and wall carvings - in the ruins of Ancient Egypt!

Friday, July 25, 2014

How to Make Your Own Baby Food - Tips, Advice and Recipes

The baby food wars have been fought for several decades now. When my son was an infant, 20-something years ago, my friends thought I was insane for making his baby food. I started making his food because it saved money, was easy and traditional, and made me feel a little closer my baby - but as I learned more about nutrition, I realized that was I was feeding my baby was healthier. And I didn't worry about the scares regarding glass in baby food, or chemicals in baby food, or various recalls of baby food.

For anyone who thinks making baby food is difficult - put your mind at ease. Nothing could be easier. Baby food is simply softer - mashed or pureed - versions of regular foods. A soft, mashed banana is baby food. A mashed egg yolk with a few drops of breast milk or formula is baby food. You do not need fancy equipment or jars (although they can be nice) - a fork, a potato masher, or a hand-turned food-mill all work beautifully. However, there are a few rules. The first set of rules are basic, Cooking 101 cleanliness rules. These are rules we should all be following when preparing food for ourselves and our families - and not just for baby. But they are far more important when cooking for baby!

Cleanliness Rules

  1. All cooking utensils, containers, spoons, mashers, etc must be clean - wash in HOT soapy water, rinse well in HOT water, and allow to air dry in a clean rack.
  2. Your hands should be clean before preparing any food - this includes under your nails.
  3. Your cooking space and prep space should be clean - countertops, cutting boards, stovetops, microwave - whatever you will be using should be clean.
  4. The containers you will be using for your baby food should be clean - wash in HOT soapy water, rinse in HOT water, and allow to air dry on a clean rack.
Now that your space is ready, you can start making baby food. There are many debates about what is and is not the best food for your baby. I can only advise that you consult with your own pediatrician about any concerns you might have - and spend some time reading up on the current nutritional advice. Also, buy the very best produce you can afford - it makes a difference - but if you cannot afford organic for everything than try to avoid the foods most likely to be sprayed.

Personally, I feel the best first foods (for babies 6-8 months old, who are just starting on solids) are mashed banana, mashed sweet potato, mashed egg yolk (being careful regarding possible sensitivity - and avoiding egg white), and mashed avocado. These foods are all highly nutritious and can be easily mashed - and can be mixed with expressed breast milk, formula, or filtered water to make a smoother puree. And remember, at this stage baby is getting most of her nutrition and calories from breast milk or formula - servings of baby foods should be limited to 1-2 tablespoons per day.

For slightly older babies (8-12 months old, who have teeth and can "self-feed" a little) I like to offer tiny, diced pieces of banana or steamed carrots or roasted/steamed sweet potato. This is the stage where I feel more comfortable introducing grains, such as oatmeal and rice. For this age of baby, I also often start using small amounts of homemade chicken stock or broth to both flavor the vegetables, and they are now more of a "sturdy mash" than "puree" in texture. (NOTE: Commercial stocks and broths often contain sodium and other "no-no" items - so I do not recommend them for baby.)


How to Make Vegetable Purees

Vegetable Purees are an easy and nutritious first food for baby. Common first vegetables are avocado, sweet potato, butternut and other winter squash, and peas. Do not start any vegetable or fruit/vegetable combinations until baby has had each food "solo" for at least one week without reaction.
  1. Carefully wash vegetables, allow to air dry.
  2. Peel, remove ends, hard pieces, and any seeds.
  3. Cut the vegetables into small pieces.
  4. Steam until soft (but not completely mushy) in a small amount of water, allow to cool, and then mash or puree. NOTE: Peas can be tricky because of their skins - a blender or food mill usually gets a smoother texture - or you can push your puree through a sieve.
  5. Test texture, and add small amount of expressed breast milk, formula, or filtered water if the puree needs to be thinned.
  6. Place 2-4 Tablespoon servings of the puree into your container of choice. I used ice-cube trays to freeze batches of baby food, and once frozen the foods were stored in labeled and dated freezer containers.
  7. NOTE: Fresh baby food should be stored in the refrigerator and used with 24 hours. Frozen baby food should be stored no more than 1 month in the freezer before using.
  8. Gently warm baby food to room temperature before serving.
  9. NOTE: IF you use a microwave to warm or defrost baby food, you MUST STIR WELL and test the temperature carefully to avoid burning baby!
How to Make Fruit Purees

Fruit purees are an easy treat for baby. Common first fruits are bananas, mangoes, apples, prunes, and peaches. I have found that babies tend to be sensitive to berries - so be careful when starting any berry purees, and do not start any fruit combinations until baby has had each fruit "solo" for at least one week without reaction.
  1. Carefully wash fruit, allow to air dry.
  2. Peel fruit, remove any pits or seeds.
  3. Cut fruit into small pieces. Mash with a fork, potato masher, or food mill.
  4. Harder fruits, such as apples, may need to be cooked first. Simply cut into small pieces, until soft (but not completely mushy) in a small amount of water, allow to cool, and then mash or puree.
  5. Test texture, and add small amount of expressed breast milk, formula, or filtered water if the puree needs to be thinned.
  6. Place 2-4 Tablespoon servings of the puree into your container of choice. I used ice-cube trays to freeze batches of baby food, and once frozen the foods were stored in labeled and dated freezer containers.
  7. NOTE: Fresh baby food should be stored in the refrigerator and used with 24 hours. Frozen baby food should be stored no more than 1 month in the freezer before using.
  8. Gently warm baby food to room temperature.
  9. NOTE: IF you use a microwave to warm or defrost baby food, you MUST STIR WELL and test the temperature carefully to avoid burning baby!
How to Make Meat Purees

Meat purees are a bit trickier - a food-mill or food processor is very helpful. Chicken and fish are common "firsts" and both are easy to prepare. I like to introduce meats in combinations with rice and a vegetable, sort of a baby stew. In general, babies should not be eating meat until they are able to "chew" a bit - usually after 8-10 months of age. Speak with your pediatrician about best choices of fish, based on current knowledge of any contaminants, such as mercury - and avoid canned meats or fish for baby.
  1. Carefully wash the chicken or fish. Remove any bones, skin, connective tissues - anything baby might choke on,
  2. Cook thoroughly. I find steaming fish is best, and roasting or poaching chicken is best. Allow to cool once fully cooked (no rare meat for baby!)
  3. Fish can generally be flaked and then mashed. Chicken should be cut into very small pieces and then run through a food mill or food processor with a small amount of liquid until smooth.
  4. Place 2-4 Tablespoon servings of the puree into your container of choice. I used ice-cube trays to freeze batches of baby food, and once frozen the foods were stored in labeled and dated freezer containers.
  5. NOTE: Fresh baby food should be stored in the refrigerator and used with 24 hours. Frozen baby food should be stored no more than 1 month in the freezer before using.
  6. Gently warm baby food to room temperature.
  7. NOTE: IF you use a microwave to warm or defrost baby food, you MUST STIR WELL and test the temperature carefully to avoid burning baby!
Here are a few favorite recipes to get you started - and then have fun researching more online, or making up your own using your family's favorites!

Roasted Sweet Potato for Beginners

2 Sweet Potatoes, scrubbed
Poke holes in the Sweet Potato with a fork. Roast the Sweet Potato on a lined cookie sheet in a 400F oven until tender (about 30-45 minutes). Allow to cool. Cut open and scrape the orange flesh into a bowl. Mash well. **Sweet Potatoes and Apples make a nice combo!

Apple Sauce for Beginners

2 large apples (Macintosh apples are nice because they get soft quickly)
Peel, core, and dice the apples. Place in a small saucepan with about 1 Tablespoon of water, Cook over low heat, stirring and "mashing" with a fork or the back of a spoon. Once the apple is mushy, stop cooking. Drain the liquid (and reserve it in case you need it for thinning) and allow the apples to cool completely. Test the texture, using the reserved cooking liquid to thin it, if needed. **Apples mix well with just about anything - other fruits, vegetables, grains, and even meats!

Eggy Mash

4 hard-boiled egg yolks
1/2 soft avocado
Mash both well together, adding liquid as necessary to make a smooth texture.

Chicken and Rice Baby Dinner

1 Tbs minced, cooked chicken
1/2 to 1 Tbs cooked rice
1 Tbs pureed vegetable of choice

Mash all three ingredients together, adding liquid as necessary to make a smooth texture.

Salmon and Rice Baby Dinner

1 Tbs minced, cooked salmon (or any other fish, as desired)
1/2 to 1 Tbs cooked rice
1 Tbs pureed vegetable of choice

Mash all three ingredients together, adding liquid as necessary to make a smooth texture.

NOTE: High-nitrate vegetables (beets, broccoli, cabbage, carrots, celery, collard greens, lettuce, spinach, turnips, etc) should not be fed to babies in large quantities. Limit to 1-2 Tablespoons total per day.

I hope you enjoy making your own baby food as much as I did...and as much as I do for my new grandbaby! The times may have changes, but mashing basic foods never goes out of style!


(This originally appeared on Yahoo via the Yahoo Contributors network)

Thursday, June 12, 2014

Mulberries and Syrup


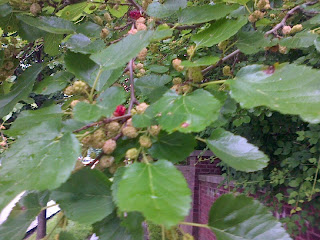
The mulberries are almost in season, unripe green and red berries tease the birds and tease me with promises of the dark purple gems of sweet juicy goodness to come!

Mulberries are very common in my area - the trees I picked from as a child are still bearing berries. I brought my son there, and in another year I will bring my grandson and once again enjoy the sticky fun of berries being picked off the tree and then smooshed in little fingers. Mulberries are fragile, they bruise and rot too quickly to sell at market - but if you have a dry day and a few hours, you can pick a few sackfuls of these healthy and delicious berries - and then freeze or preserve what you can't stuff right into your mouth (smile). One quick and easy tip? Lay a clean sheet under the tree...and shake the branches. Berries will fall right into your hands.

I usually pick carefully, but if children are helping you will want to look through for any bits of stem or leaves (which can make you sick). You also want to ensure you *only* pick ripe berries, as unripe berries will give you a tummy ache.

I give my berries a quick swirl in a water/vinegar bath (1 part white or cider vinegar to 10 parts water) and then gently shake them dry in a colander lined with paper towel. Once dried off, you can lay the berries on waxed paper or parchment lined cookie sheets for freezing (once frozen, pop them into labeled freezer bags).

Mulberry Syrup

For a delicious syrup, gently simmer berries in a heavy-bottomed saucepan with a small amount of water (figure about 1/4 cup to 4-5 cups of berries) to keep them from scorching. Gently press down on the berries as they cook, to release the juice. Strain the juice into a bowl, being sure to gently press the berries to extract all the juice. For each cup of juice, I add about 1/2 cup organic sugar or honey, to taste. Return to the saucepan, simmer and stir til well combined. Pour into a hot jar, cover, and cool. This will store well in the refrigerator. To store larger quantities, you will want to process in a hot water bath - and I would add 1 Tsp lemon juice to each pint if I were doing that.

How do you like to enjoy mulberry season? Comment below!

Tuesday, November 26, 2013

Chicken Pot Pie Recipe

I love a good chicken pot pie - and I love my home made pies more than anything I can get from the supermarket! Home made pies save money - and they let you customize your pie to what you have on hand. In a pinch, you can make a filling and delicious dinner for yourself and a VERY hungry man using 1 chicken breast, 1 premade pie crust, some veggies, and a packet of gravy mix (smile). 


Chicken Pot Pie Recipe


1 batch pie crust (I use only one crust)
1 chicken breast, cooked and diced

1-2 cups cooked, diced mixed vegetables (use what you have on hand!)
1 cup gravy (see below)

Preheat oven to 350F. Evenly scatter pieces of chicken across the pie pan or medium baking dish. Spoon vegetables evenly over the chicken. Carefully pour gravy over it all. Place crust over the top, and fold over at edges of pie pan to seal. Pierce with a fork to vent steam. Bake 20 minutes, until crust is browned and gravy is bubbly.


Gravy

2 Tbs butter or fat

2 Tbs flour
1 Tbs cream or milk
1 C chicken stock or broth

Melt the butter in a small saucepan over low heat. Stir in the flour, and stir continually as the flour cooks - about 2 minutes. Stir in the cream or milk, and then stir in the chicken stock a little at a time so it blends well and doesn't get all lumpy. 


In a pinch, just use a good brand of packet gravy (I like Knorr's Roast Chicken flavor, smile!).


Chicken Pot Pie with Mashed Potato Topping Recipe

1 batch pie crust (I use a bottom crust only for this pie)

3-4 medium potatoes, cooked and mashed with 1 Tbs each butter and milk/cream
1 chicken breast, cooked and diced

1-2 cups cooked, diced mixed vegetables (use what you have on hand!)
1 cup gravy (see below)

Preheat oven to 350F. Put pie crust in pie pan or medium baking dish, Evenly scatter pieces of chicken across the crust. Spoon vegetables evenly over the chicken. Spoon gravy over it all. Carefully drop mashed potatoes by the spoonful along the top - or get fancy and pipe it! Bake 20 minutes, until potatoes are lightly browned and gravy is bubbly. Sometimes I sprinkle a bit of grated Muenster cheese on top of the potatoes - for extra yumminess!

Tuesday, November 19, 2013

Salmon Cakes Recipe

I made amazingly delicious salmon cakes over the weekend...the toasty brown  exterior giving way to a light and fluffy interior...drizzled with a hot mustard sauce...mmm. And they are healthy! And you can swap in other fish! Mmm...pollock cakes! 

Delicious and healthy make for a major thumbs-up in our house (smile). The potato and egg bind the cakes together - but I find they are easier to form into patties if a wee bit of flour is added.


Easy Salmon Cakes


1 14-oz can of salmon, drained

3 medium potatoes, peeled and diced
1 small onion, minced
1 Tbs butter
2 eggs, beaten
1 Tbs flour + extra for dusting
1 cup breadcrumbs (for coating)

Boil and mash the potatoes, and put aside to cool. Saute the onion in the butter until limp and lightly golden. Stir the onions into the potatoes.


In a large bowl, flake the drained salmon. Stir in the potatoes and onion and mix well. Add 1 egg (about 2 Tbs of the total beaten egg) and mix well. Form the mixture into 8 balls and place on a lightly floured plate. Place in fridge and chill about 15 minutes - until they are a bit firmer. 


Set up a "breading station" with a dish of flour, a dish with the beaten egg, a dish of breadcrumbs, and a floured plate to place the finished patties on. Take the chilled salmon from the fridge. Gently flatten a ball, dust in the flour, dip into the egg (gently shake off excess egg), and dip into the breadcrumbs. Continue with each portion of salmon.


Heat a fry pan with about 1/4" of oil (I used canola oil) over medium heat. When the oil is hot, gently slip patties into the oil so that they are not touching  - my fry pan allows 3 at a time, yours may allow more or less. Cook about 2-3 minutes on hte first side - look at the sides to see if the coating is turning toasty brown. Carefully turn the patties (I use 2 wooden spatulas to do this, so they don't fall apart and they don't splash and splatter hot fat). Cook on the other side until toasty brown. Remove from heat and allow to drain for a moment.

Drizzled with hot mustard sauce and serve with sauteed greens! When I serve this to the menfolk, I also make them a side of mashed potatoes. The Boy likes to just slap one onto a burger bun with lettuce and sauce and eat on the go.

Hot Mustard Sauce

1/2 C heavy cream
1 Tbs hot mustard
1 Tbs lemon juice

Stir over medium heat in a small saucepan until well blended and evenly heated. 

Thursday, November 14, 2013

Pizza Dough Recipe: From the Blooming Kitchen Garden

Homemade pizza is so easy and delicious - and making it yourself allows you the freedom to truly "have it your way." We like our pizza loaded with Parmesan and Mozzarella cheeses, with lots of veggies tucked in... and sometimes a little spicy sausage crumbled on as well.  To make your own pizza, you need an easy pizza dough recipe. Making your own is far more frugal and healthy (and tastier!) than buying prepared dough!


Pizza Dough Recipe


2 Tsp (or 1 package) instant dry active yeast

1 C warm water
2 Tsp sugar
3 C  flour, plus extra for dusting/kneading
1-2 Tbs olive oil
2 Tsp salt

Method

Stir water, yeast, sugar, and a 1/2 cup of flour in a large bowl, and then let sit in a warm place for 20 minutes. Watch for the yeast bubbling up as it eats the sugar and flour (yes - I make this with children, smile).


Add the olive oil, salt, and the remainder of the flour. Mix with your wooden spoon until the dough "pulls together" - then turn it out on to a lightly floured work surface for kneading. (I just flour my counter-top - but I know some folks like to use a board or a mat - whatever suits!)


Knead the dough for about 10 minutes - until it is soft and smooth and elastic and just a little bit "still sticky." You can dust with flour a little at a time if it feels too sticky - but don;t add too much in. I often measure out about 1/4 cup for dusting both the countertop and the dough to make sure I don't accidentally add too much.


Form the dough into a ball and place in a large oiled bowl. Flip the dough over to ensure it is all covered with oil. Cover the bowl with a cloth and let it sit in a warm spot for about 2 hours - until it is doubled in size.

Punch the dough down, and divide into 2 pieces. Form a ball of each piece and let them rest on a lightly floured or oiled surface (to avoid sticking) for about 15 minutes. At this point, you can either proceed to make 2 pizzas OR you can place the dough into a large plastic baggie (I use a gallon baggie for each ball so there is lots of room) or wrap well in plastic wrap and refrigerate until you want to use. I never let this sit more than 4 days in the fridge.